Thursday, July 19, 2018

JMS Topic and Subscribers in OSB Proxy service

JMS Queue vs JMS Topic

JMS Queue is Point-to-point solution based on Publisher/ Subscriber model, which means there can be only one Subscriber per queue. If the Subscriber is down, the messages will persist in the queue until the Subscriber comes up. Once the Subscriber is up, the message will be consumed and processed.

JMS Topic is a distribution mechanism for publishing messages that are delivered to multiple subscribers, which means there can be multiple subscribers per Topic. Single message can be consumed by multiple subscribers and processed individually. 


  • With Durable Subscription Enabled in Proxy :- If one of the subscriber is down, the message will be persisted in Topic till that subscriber is available.However the same message will be consumed by other consumers.

  • With Durable Subscription Disabled in Proxy :- If one of the subscriber is down, the message will not be persisted in Topic. However the message will be consumed by other consumers(whatever is up and running).
So based on your scenario you can decide whether to create a durable subscriber or not. We will see both the options here.

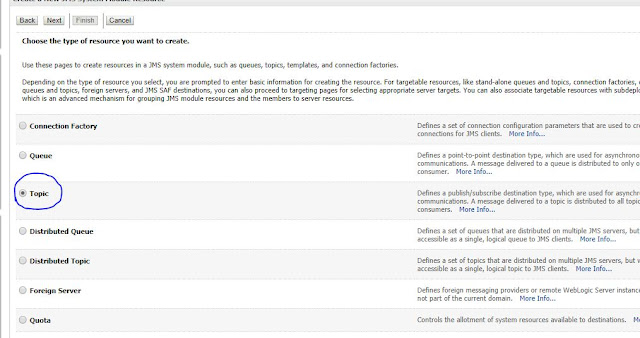
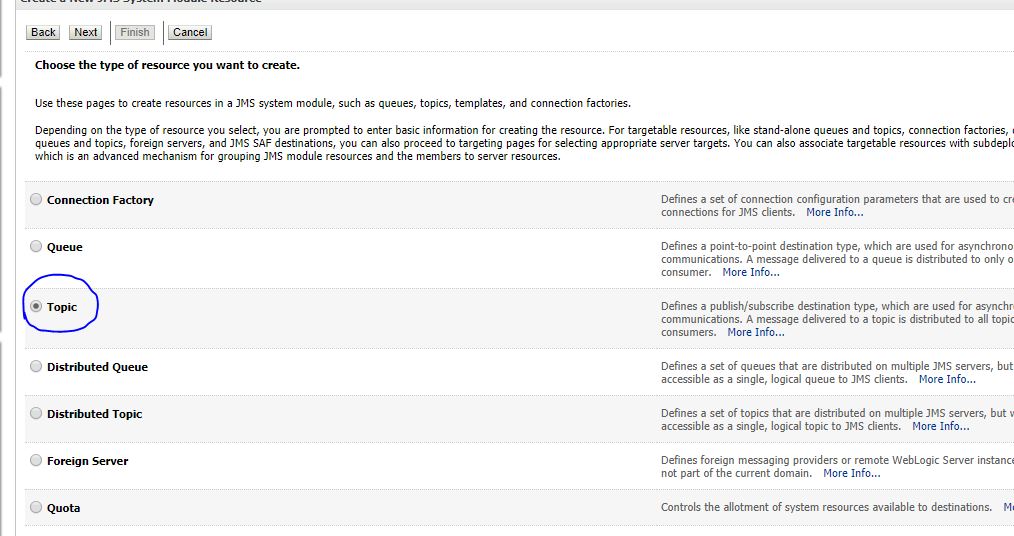
First lets create a JMS Topic.
Login to Weblogic console. Navigate to JMS Module and select the module you want to create the topic.


You can select one of your JMSServers as the Target.

We have the JMS Topic ready, now we can start creating the Subscribers in OSB Proxy Service.

Login to SbConsole and Create a new Project.
And Create a new Proxy Service with service type as "Any XML Service"


Select JMS as Protocol and enter host,port and Jndi name of topic.
Sample: jms://22.22.22.22:7001/weblogic.jms.XAConnectionFactory/test.topic


Select option as "Topic"


This is the place where you have to  decide whether you need Durable Subscriber or not.!!! First lets create Proxy service with Durable Subscription disabled.


Now click Last and save the configuration.

Lets add a alert in the proxy pipeline .So that we can validate the execution of Proxy service.

** assuming you already a alert destination.
 

Now create a another proxy service to listen to the same topic. (you can just clone the first proxy service) and edit the alert summary as "Testing Topic -Proxy Service 2".

Now we have created 2 proxy service listening to the same JMS topic.

So once you produce the message, both proxy service should consume the message and create the alert messages.

To produce the message into topic, i'm creating a new business service with same JNDI details. (testing purpose).
Finally  your project will look something like below.


Activate the Session.

And your Topic will look like below.


Since you have created a proxy without durable subscription. you will not see any rows in Durable subscribers tab.


Execute the Business Service with some sample XML.
You will immediately see 2 alerts generating in the operations tab.


Hence you can confirm your message have been picked up by both proxy service and your subscribers are working fine.

******************************************************************

Now lets enable the durable subscription in proxy service(both proxy service).

Once you have enabled the durable subscription and activated the session. You  can see the changes in weblogic console as well. Now Durable subscribers tab will have 2 new rows and its status.


You can test the scenarios, like 
Keep both proxy services up and running, see what happens.
Disable one of the proxy service and see whether the messages are stored in Topic.
Disable both proxy service and see what happens.

How to disable a Proxy Service ? Click here

Monday, June 18, 2018

Disable Auto Compile in Jdeveloper 12C after saving Composite.xml

One of the (annoying)feature which gets enabled by default after installing Jdeveloper 12c is auto build after saving composite.xml

To disable the same, Navigate to  Tools->Preferences->Code Editor->Save Actions and delete the below action (Build Project after save).


Pause JMS Queue Message Consumption At Server Startup - Weblogic

How do we pause JMS Queue Message Consumption at Server Startup/ Restart

  • Login to Weblogic Console.
  • Navigate to JMS Module-> Module name -> Select the Queue you want to pause.
  • In Configuration-> expand Advance and enable the check box at Pause Message Consumption At Startup
After you finish, You must restart Server for the changes to reflect.


If you want to pause all the queues hosted in JMS servers, You can do the same configuration in JMS servers as well.

Navigate to Services >Messaging > JMS Servers> select the JMS server
  • In Configuration-> expand Advance and enable the check box at Pause Message Consumption At Startup

Saturday, May 26, 2018

How to Verify/Apply the Patches Applied to an Oracle Home

To List the patches applied to your Oracle Home.

Go to Oracle Home and Run opatch under OPatch Folder
(Provide the full path for Oracle Home while running the command)

/soa/oracle/OPatch/opatch lsinventory


How to Apply Patch

Extract the Patch folder you downloaded from Oracle Support Site.
Go into the Extracted folder and run below command. Before Running, make sure you shutdown all the servers including admin server.
$ORACLE_HOME/OPatch/opatch apply
Example: /soa/oracle/OPatch/opatch apply


Saturday, May 19, 2018

How to create Proxy Server in OSB Business Service | SOA 12C

For few of the web services with downstream systems, we need to invoke them via a proxy servers.
In the below screenshot, i have shown the how to create a proxy server and associate it with Business service in OSB.

Expand System project(which is a default project with empty folders in OSB).
Select Proxy Server.


Right Click on Proxy Servers folder, then Create -> Create Proxy Server.

 Give a Proxy Server name and details, as shown below.


Once the Proxy Server is created successfully, Open your Business Service and select the Transport Detail page. In the Advanced Options, select the Proxy server you have created in the previous step.


And you are done!!

Thursday, May 17, 2018

The invocation resulted in an error: Server chose TLSv1, but that protocol version is not enabled or not supported by the client.

Error while invoking HTTPS URL from OSB Business service.

Error Message: The invocation resulted in an error: Server chose TLSv1, but that protocol version is not enabled or not supported by the client.

Steps to Resolve: 
  • Open weblogic console., Click on Servers

  •  Click on OSB Server

  • Navigate to Configuration->Server Start


  • Add the below property in Arguments

Dweblogic.security.SSL.minimumProtocolVersion=TLSv1


Now Restart the OSB Server for the changes to reflect.

Reference: https://docs.oracle.com/middleware/1213/wls/SECMG/ssl_version.htm#SECMG636

Wednesday, May 16, 2018

ESS (Enterprise Scheduler Service) for Inbound JCA Adapters in SOA 12C

Enterprise Scheduler Service (ESS) is a scheduler that is part of SOA Suite 12c. ESS supports a number of scheduling activities around the SOA Suite.
With the help of em console, we can manage job requests, define metadata and schedule jobs, and APIs to define metadata and create schedules in ESS.
In this section, we are going to create a schedule and assign it to a Inbound JCA (jms,file,db polling,etc..) adapter.

Scenario: Deactivate the DB adapter at 10 PM everyday and activate it back at 8 AM next morning. In this case, records created  by system between 10 PM to 8 AM will not be processed immediately.

Expand Scheduling Services, Right click on ESSAPP. Job Requests-> Define Schedules.


Click on Create to create a new schedule.

Now we have to create 2 Schedules, One for activation and other for Deactivation. (Sequence doesn't matter)
Please note that package have to be mentioned as "soa".
First Deactivation,
 Now Activation,


If you want to look at the schedules, you can just click on name of one the schedules.


Now you can go to your composite, And click on adapter.

 Click on calendar icon on the right corner.

Select the schedules created in above steps and click on Apply Schedules.


And you are done!!!!

Note: I have experienced a issue with clustered ESS servers, the schedules created were not displaying in the adapter. So i brought down one of the ESS server and tried the same and it worked. Not sure whether its product bug, so keep this as a workaround if adapters are not showing the schedules created.

Sunday, April 15, 2018

Throttling in OSB 11g - with Work Managers

There are few legacy systems which will not be able to handle too much of load simultaneously. In that cases we need to throttle our system not to send too much requests in parallel.

In OSB, we have 2 different approach to handle this situation.
1. Enable Throttling in Business service.
2. Use custom work manager in Proxy Service.

Throttling in Business Service:

We have an Out-of-box configuration in Business service, where you can just enable the throttling by just check box and configure the values.

But its not available in during the design time, so once the code is deployed to sbconsole. Please follow the below steps to configure the same.

1. Login to Sbconsole.
2. Go to Project Explorer and select the Business service you want to throttle.
3. Select Operational Settings tab.
4. In this tab, under Throttling, select the Enable check box.

  • Maximum Concurrency - Number of parallel request to that service.
  • Throttling Queue - to backlog messages that has exceeded the message concurrency limit
  • Message Expiration - Specify the number of milliseconds that a message can spend in Throttling Queue. The message will be erased after specified time. (It is a optional field) If the message expiration is set to "0" , the message will never expire.


Note: The Queue is a cache memory, so if the server crashes or restarts the messages stored in Throttling queue will be lost.

Throttling Using Proxy service: 

So the Better the option to handle throttling will be work managers along with Proxy Service.
Follow the below steps to create work manager,

1. Login to Console.
2. Select Work Managers.


3. Click on New.
 4. Select Work Manager.
 5. Name the Work Manager and select the targeted server.
 6. Now Click on the Custom Work Manger you have created.
 7. Select "New" on Maximum Thread constraint.
 8. Specify the number of thread you wish to use.
9. Now Activate the session.
 10. Login to Sbconsole and navigate to the Proxy Service.

11. Select the "dispatch-policy" under HTTP Transport Configuration and activate the session.

Note: In this case, the throttling will happen at the proxy service layer itself. So there wont be any message loss.


Friday, April 13, 2018

Create Custom Xpath function in OSB - SOA 11g

In this post, we are going to see how to create Custom Xpath function for OSB 11g. I'm going to take a example of replicating the XREF functions which are available in BPEL,but not in OSB.
The Custom Xref functions are created using a Java Code and deployed into our Server. After restarting the Server, Xref functions will be available in sbconsole. The available Xref Functions will be 
  • populateXrefRow(),
  • deleteXrefRow(),
  • lookupXRef(),
  • lookupXRef1M().
STEPS:
  1.  All the Cross reference values will be stored in XREF_DATA inside SOA_Infra Schema(Or we can change the schema location, Please find the SQL below to create tables in desired schema).  So In Java code we will be connecting to the database(via DataSource) and will retrieve the corresponding values.
  2. Please verify data source “jdbc/SOADataSource” is available and connecting to the schema (which has Xref_data table).
  3. And For Connecting to Database we need a external Jar(ojdbc6.jar and weblogic.jar) to be Imported inside your java Project. It can be imported like, Right click on the Project ->Java Build Path ->Add Jar.
  4. Implement the Java code which will contain the four below functions. (Code attached Below)
  5. Once the code is compiled successfully, we need to export the Java Code as “JAR” file and Copy the Jar File into $OSB_HOME/config/xpath-functions.
  6. Now Create a XML File which will contain the namespace,Class and function name,etc., Like attached (CustomXrefFunctions.xml),
  7. After Placing the XML file in the Same location ($OSB_HOME/config/xpath-functions), Restart the Server. Then Xref functions will be available in the sbconsole.

SQL Statements to create XREF Tables (If you are not planning to use default schemas)

CREATE TABLE XREF_DATA
(
    XREF_TABLE_NAME VARCHAR2(2000) NOT NULL,
    XREF_COLUMN_NAME VARCHAR2(2000) NOT NULL,
    ROW_NUMBER VARCHAR2(48) NOT NULL,
    VALUE VARCHAR2(2000) NOT NULL,
    IS_DELETED VARCHAR2(1) NOT NULL,
    LAST_MODIFIED TIMESTAMP NOT NULL
);
ALTER TABLE XREF_DATA
    ADD CONSTRAINT XREF_DATA_PK PRIMARY KEY (XREF_TABLE_NAME, XREF_COLUMN_NAME, VALUE);

CREATE INDEX XREF_ROW_NUMBER ON XREF_DATA
    (ROW_NUMBER );

CREATE INDEX XREF_VALUE ON XREF_DATA
    (VALUE );

JAVA Code:


Thursday, April 12, 2018

How to Copy Files/Folders from one server to another remote server in Linux

We can use scp command to copy files and folders from one server to another server. Below is the syntax for scp command.

scp [-1246BCpqrv] [-c cipher] [-F ssh_config] [-i identity_file] [-l limit] [-o ssh_option] [-P port] [-S program] [[user@]host1:]file1 ...[[user@]host2:]file2

scp stands for secure cp (copy), which means you can copy files across ssh connection, it uses the port 22 by default.

  • Copy File from Server 1 to Server 2, assuming you already logged in to server 1.
scp /path/of/file username@serverhost:/path/to/destination
example: scp /tmp/sample.txt user1@122.1.1.197:/tmp/sampledirectory/

  • Copy folders from Server 1 to Server 2, assuming you already logged in to server 1.

scp -r /path/of/source-folder user@server:/path/to/destination-folder/
example: scp -r /tmp/somedirectory user1@122.1.1.197:/tmp/sampledirectory/
Note: -r Recursively copy entire directories.

  • Copy specific files under a folder from Server 1 to Server 2, assuming you already logged in to server 1.
scp /path/of/source-folder/*.txt user@server:/path/to/destination-folder/
example: scp /tmp/sample/*.txt user1@127.1.1.197:/home/sample/