Wednesday, December 4, 2019

Hello World in OIC - with SOAP Adapter

Below Post will explain the steps to create a Hello World Web-Service in OIC. Its a simple project, with all the screenshots provided. I have tried to compare it with OSB/BPEL for easy understanding.

Once you login to the console, Below is the Home page. Please click on Integrations.


Once you click on Integrations, it will take you to the Designer console.
First we need to create a Connections, It will be exposed as a webservice to external system.
Creating Connections is similar to Proxy Service (OSB) or Exposed Service in BPEL.


Select SOAP Adapter.


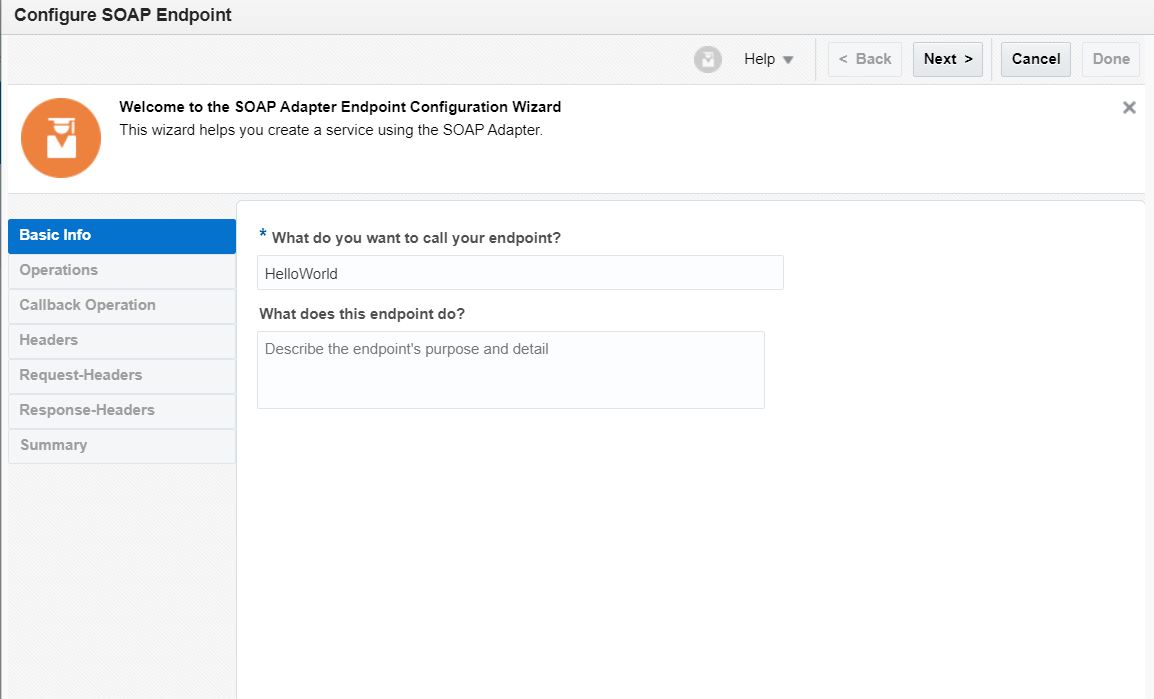
Provide a relevant name.
Trigger - Equivalent to Proxy service(OSB) or Exposed Service (BPEL)
Invoke - Equivalent to Business service(OSB) or External Reference (BPEL)
Trigger and Invoke - Can be used as both.


You need to select a Concrete WSDL here. Which will be exposed to the external system.


All the SOAP webservice have to be protected with security. (This usually will be the username-password which you used to login)

Once done, you have to click on Test and make sure you have 100% which means you don't have any error and the connection is ready to use.


Now we will create the Integration where the flow is defined. Which is similar to Proxy Pipeline(OSB) or BPEL (BPEL).


Select the App Driven Orchestration.


Select the connection you have created in above steps.
Note: If your connection doesn't appear here, it means the connection is not 100% and not ready to use. Go back and check the connection.

 Configure the endpoint and leave all the others with default.

It will create a flow with a default mapping in it.
 Select the edit icon for mapping input-output.
For simpler mapping you can click and drag it from Source to target. If you want to use functions, click on the element name.


Select the function you want to use from left tab and complete your mapping.


Once the mapping is complete you can see there is an error on home page. This is a warning message is set the Instance Tracking.


Save the Project.


Once you activate it, it will provide the URL for you to test.


Create a SOAP UI project and test it.


Courtesy : Naresh Pagidipala, who taught me the basis of OIC.


Tuesday, October 23, 2018

Dynamic Partnerlink in BPEL | SOA

How to setup dynamic partnerlink in BPEL. This is used to override the targetsystem URL in the run time. The URL can be stored in AIAConfigurationProperties.xml or variable or URL can be received as input too.

  • Create two variables(TargetEndpointLocation & EndpointReference) as shown below.

For variable "EndpointReference", you can download the schema from below url.

  • Then create an Assign activity with 3 copy actions. Assuming "TargetEndpointLocation" variable already have the Address URL.


Source Code for this assign:
<assign name="AssignPartnerlinkEndpointReference">
<copy>
<from>
<wsa:EndpointReference xmlns:wsa="http://schemas.xmlsoap.org/ws/2003/03/addressing">
<wsa:Address/>
</wsa:EndpointReference>
</from>
<to variable="EndpointReference"/>
</copy>
<copy>
<from variable="TargetEndpointLocation"/>
<to variable="EndpointReference"
                query="/wsa:EndpointReference/wsa:Address"/>
</copy>
<copy>
<from variable="EndpointReference"/>
<to partnerLink="OrderManagementOSM"/>
</copy>
</assign>

Note: If you are using AIA, you can use the below java code to retrieve the URL from AIAConfigurationProperties.xml


Monday, July 30, 2018

WLST Script : To Create CFS Key in EM Console - SOA

How to Connect to WLST?

Run ./wlst.sh command under $ORACLE_HOME/common/bin/wlst.sh

It will be in offline mode. So,
connect()
Enter username and password along with your admin host and port.


Once its online, Run the below command.

How to Create CFS Key?

createCred(map="mapName", key="keyName", user="userName", password="passW", [desc="description"])

Sample: createCred(map="oracle.wsm.security", key="Test-key", user="username", password="pwd123", desc="Test WLST")


As you can see the command has created the Key Successfully. To verify, you can login to EM Console and validate the same.
http://adminhost:port/em/
Expand Weblogic domain -> Right Click on SOA Server ->Security->Credentials


Other Operations you can perform on CFS key's are,
  • listCred - returns the list of attribute values of a credential in the domain credential store with given map name and key name
  • updateCred - modifies the type, user name, and password of a credential in the domain credential store with given map name and key name.
  • deleteCred - removes a credential with given map name and key name from the domain credential store


Thursday, July 19, 2018

How to Disable a Proxy Service in OSB

Login to SBConsole.
Select the proxy service you want to disable.
Navigate to "Operational Settings" tab.
Disable the Check box on State.


Save the changes.
Activate the Session.

JMS Topic and Subscribers in OSB Proxy service

JMS Queue vs JMS Topic

JMS Queue is Point-to-point solution based on Publisher/ Subscriber model, which means there can be only one Subscriber per queue. If the Subscriber is down, the messages will persist in the queue until the Subscriber comes up. Once the Subscriber is up, the message will be consumed and processed.

JMS Topic is a distribution mechanism for publishing messages that are delivered to multiple subscribers, which means there can be multiple subscribers per Topic. Single message can be consumed by multiple subscribers and processed individually. 


  • With Durable Subscription Enabled in Proxy :- If one of the subscriber is down, the message will be persisted in Topic till that subscriber is available.However the same message will be consumed by other consumers.

  • With Durable Subscription Disabled in Proxy :- If one of the subscriber is down, the message will not be persisted in Topic. However the message will be consumed by other consumers(whatever is up and running).
So based on your scenario you can decide whether to create a durable subscriber or not. We will see both the options here.

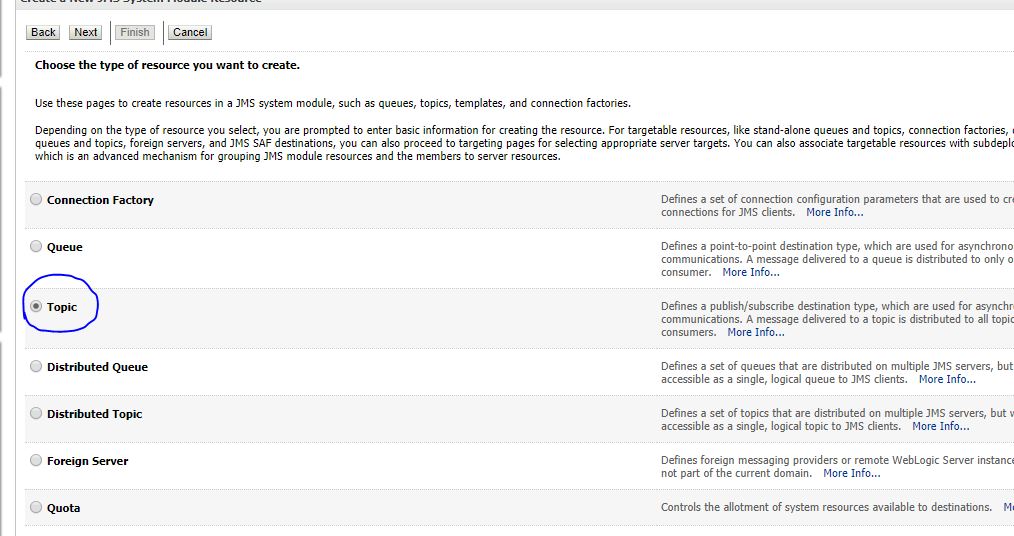
First lets create a JMS Topic.
Login to Weblogic console. Navigate to JMS Module and select the module you want to create the topic.


You can select one of your JMSServers as the Target.

We have the JMS Topic ready, now we can start creating the Subscribers in OSB Proxy Service.

Login to SbConsole and Create a new Project.
And Create a new Proxy Service with service type as "Any XML Service"


Select JMS as Protocol and enter host,port and Jndi name of topic.
Sample: jms://22.22.22.22:7001/weblogic.jms.XAConnectionFactory/test.topic


Select option as "Topic"


This is the place where you have to  decide whether you need Durable Subscriber or not.!!! First lets create Proxy service with Durable Subscription disabled.


Now click Last and save the configuration.

Lets add a alert in the proxy pipeline .So that we can validate the execution of Proxy service.

** assuming you already a alert destination.
 

Now create a another proxy service to listen to the same topic. (you can just clone the first proxy service) and edit the alert summary as "Testing Topic -Proxy Service 2".

Now we have created 2 proxy service listening to the same JMS topic.

So once you produce the message, both proxy service should consume the message and create the alert messages.

To produce the message into topic, i'm creating a new business service with same JNDI details. (testing purpose).
Finally  your project will look something like below.


Activate the Session.

And your Topic will look like below.


Since you have created a proxy without durable subscription. you will not see any rows in Durable subscribers tab.


Execute the Business Service with some sample XML.
You will immediately see 2 alerts generating in the operations tab.


Hence you can confirm your message have been picked up by both proxy service and your subscribers are working fine.

******************************************************************

Now lets enable the durable subscription in proxy service(both proxy service).

Once you have enabled the durable subscription and activated the session. You  can see the changes in weblogic console as well. Now Durable subscribers tab will have 2 new rows and its status.


You can test the scenarios, like 
Keep both proxy services up and running, see what happens.
Disable one of the proxy service and see whether the messages are stored in Topic.
Disable both proxy service and see what happens.

How to disable a Proxy Service ? Click here